Demystifying Multi-FX: Navigating the Digital Guitar Effects Landscape with the NUX MG-30
Guitar effects can feel like a secret language. Pedals, amps, cables — it's a lot to navigate! But what if there was a simpler way to get those killer sounds without the confusion and hassle? Enter the world of multi-effects processors and amp modeling with the NUX MG-30. This little powerhouse might seem daunting at first, but with the NUX MG-30, unlocking incredible tones becomes an effortless journey. It's your all-in-one solution, making the complex world of guitar effects easily approachable.
In this blog, we'll dive deep into digital guitar effects, focusing on how the NUX MG-30 Multi-FX and Amp Modeler can be your gateway to mastering tones effortlessly. We'll unravel what it's for, how they work, and most importantly, how they can empower you to craft your desired tone without a fuss. Plus, we'll guide you through your first steps in creating tones and presets on the NUX MG-30. From choosing and tweaking amp sim models to layering effects, we'll show you how to harness this versatile tool, giving you the confidence to sculpt your own tones.
Get ready to demystify digital guitar effects and discover how the NUX MG-30 makes tweaking tones and crafting personalized presets a breeze, opening doors to a new level of sonic possibilities!
Bridging The Analog and Digital World
The Multi-FX setup mirrors the structure of an analog rig. Imagine setting up your favorite stompboxes and amps, but now it's all digital. This familiarity is the key to embracing digital processing—just approach it like an analog setup!
To set up your digital effects chain on the NUX MG-30, employ the same meticulous approach as you would with your analog rig. Envision each block on the MG-30 as the digital counterpart to its analog equivalent. The amp simulation takes on the role of your amplifier head, the cabinet impulse response (IR) faithfully mirrors your physical speaker cabinet, and the various effects blocks seamlessly represent your pedal lineup. What makes the NUX MG-30 truly shine is its embrace of familiarity. For guitarists who have dedicated hours to tweaking knobs on analog pedals and amps, the intuitive layout of this digital powerhouse feels like second nature. Moreover, the added familiarity extends to the digital graphics representing each effect and amp, further enhancing the user experience.
The process of dialing in your tone, balancing effects, and fine-tuning your sound remains fundamentally akin to the analog world.
Moreover, the NUX MG-30 seamlessly integrates into various performance and recording settings. Its compact design and versatility enable access to a plethora of tones without the need for an extensive array of physical pedals and amplifiers. Quick setup and consistent tone recall makes it an invaluable tool for guitarists across all skill levels.
Creating your own preset from scratch is where you truly make the NUX MG-30 your own. Think of it as painting a sonic masterpiece, starting with a blank canvas and gradually adding layers of color and texture.
The MG-30 offers 96 built-in factory presets crafted by artists and industry professionals like like Vinai T, Choptones, Pete Thorn, and others. But amidst this variety, your personal preset is your chance to make your mark, to create the sound that defines you.
Are you ready to sculpt your own sonic masterpiece on the NUX MG-30? Here's a step by step process to help you out with your journey toward your signature tone!
Before delving into the world of effects and tonal sculpting, it's essential to establish a solid foundation with your initial dry signal on the NUX MG-30. This process involves setting a comfortable and safe volume level, bypassing all effect blocks, and gradually layering your desired blocks for sonic experimentation.
Begin by bypassing all effect blocks and focusing solely on the dry signal. Adjust the MASTER knob gradually from minimum to your preferred volume level, ensuring it's comfortably audible without causing discomfort to your ears. With your dry signal established, it's time to introduce various effect blocks like AMP simulations, IRs (Impulse Responses), and dynamic effects.
Begin by selecting an amp simulation that resonates with your style. Whether you prefer the warm crunch of a vintage tube amp or the high-gain intensity of a modern stack, the NUX MG-30 offers a diverse range of models to explore. Begin by selecting an amp simulation that resonates with your style. Whether you prefer the warm crunch of a vintage tube amp or the high-gain intensity of a modern stack, the NUX MG-30 offers a diverse range of models to explore.
Fender-style models: embrace the classic tones reminiscent of Fender amps with simulations like JAZZ CLEAN, DELUXE RVB, BASSMATE, TWIN RVB, VIBRO KING, and SUPER RVB. These bring forth sparkling cleans and warm tones ideal for jazz, country, or pristine chord progression
Here's a taste of the "F-STYLE" amp character:
VOX-style models (Edge-of-Breakup): Discover that edge-of-breakup sound akin to VOX amps with simulations like TWEEDY, HIGHWIRE, CALI CRUNCH, CLASS A15, CLASS A30, BUDDA, MR. Z38, BRIT BLUES, MATCH, and L STAR. These capture the sweet spot between clean and overdriven, perfect for bluesy licks or dynamic rhythm play.
Here's a taste of the "V-STYLE" amp character:
MARSHALL-style models (British-Crunch): Channel the essence of British rock with simulations like PLEXI 100, PLEXI 45, BRIT 800, 1987 X 50, FIREMAN HBE, and BRIT 2000. These amps deliver that quintessential British crunch, ideal for punchy rhythm work and soaring solos.
Here's a taste of the "M-STYLE" amp character:
Modern High Gain style models (Lead-Distortion/Heavy Rhythm): Enter the realm of high-gain mayhem with simulations like SLO100, DUAL RECT, DIE VH4, VIVO and UBER. These models cater to the demands of modern metal and high-gain aficionados, delivering blistering leads and aggressive riffing power.
Here's a taste of the "MODERN HIGH GAIN-STYLE" amp character:
Whichever avenue you explore, the NUX MG-30's faithful recreations of these "go-to" amps offer an immersive experience, allowing you to dial in your preferred tones and transport your sound through the annals of legendary amplifiers' history
Still don't know which amp to go for? Here is a guide to which amp may be for you based on your style of playing or musical influence.
If you're chasing the groovy vibes of funk and neo-soul à la Cory Wong, Nile Rodgers, or Tom Misch, the TWN RVB model is your go-to. Its smooth, dynamic response captures the essence of these genres, delivering pristine clean tones that are as crisp as they are soulful.
(TWN RVB)
Here's how the TWN RVB amp model sounds in action!
For those craving the timeless crunch of classic rock legends like Slash or Eddie Van Halen or, dive into the vintage stack models—BRIT800, PLEXI100, or the raw power of the PLEXI45. These models echo the golden era of rock, offering that raw, vintage-driven tone that defined an era.
(BRIT 800)
(PLEXI 100)
(PLEXI 45)
Here's how the PLEXI 100 amp model sounds in action!
Seeking a powerful blues tone similar to John Mayer and SRV? The TWEEDY and BRIT BLUES models produce a bright sound with rich saturation. Seeking a warmer blues sound? Look no further than the CLASS A30, CLASS A15, or the VIBRO KING amp models, each offering that classic bluesy warmth and soulful resonance.
(TWEEDY)
(BRIT BLUES)
(VIBRO KING)
(CLASS A15)
(CLASS A30)
Here's how the BRIT BLUES amp model sounds in action!
Yearning for a modern lead sound that resonates with the likes of Intervals or Plini? The FIREMAN HBE amps offer a warmer yet punchy character, ideal for melting faces with expressive leads. Alternatively, the DIE VH4 model shines bright, perfect for those seeking a brighter, articulated sound that accentuates every pick attack, ideal for shredding through complex passages. You can also go for the DUAL RECT to get that John Petrucci-esque modern-classic sound that commands attention with its powerful yet nuanced presence.
(FIREMAN HBE)
(DIE VH4)
(DUAL RECT)
Here's how the FIREMAN HBE amp model sounds in action!
For powerful metal and “djent” tones, emulate the chugging prowess akin to Misha Mansoor of Periphery, John Browne of Monuments, or Ola Englund with the VIVO or UBER amp models. These amps are rich in saturation and compression yet still emitting lots of note clarity.
*All of the brand and model names mentioned on this page are Trademarks of their respective owners, which are in no way associated or affiliated with NUX Effects and Cherub Technology CO. LTD.
The critical points in amplifier equalization are pivotal frequencies within an amp's EQ range where adjustments have a pronounced impact on the overall tone. These points vary from amp to amp, influenced by the amplifier's design, the speaker configuration, and even the type of guitar used.
Understanding Critical Points
Frequency Sensitivity: Each amplifier responds uniquely to adjustments in bass, midrange, and treble frequencies. These critical points represent frequencies where the amplifier's response is particularly sensitive or pronounced.
Tonal Thresholds: These points often represent thresholds where the tonal characteristics can quickly become overpowering or unbalanced. For instance, excessively boosting bass might muddy the sound, while excessive treble may lead to piercing highs.
Finding Critical Points
Setting the Initial Parameters: Start by setting all EQ knobs flat or at their neutral positions. Adjust the GAIN and LEVEL controls to mirror the balanced volume of the flat dry signal. This establishes a baseline for further adjustments.
Digging into EQ Bands: The EQ knobs for BASS, MID, TREBLE, and PRESENCE become the focal points. Each knob adjustment will gradually reveal the critical points for these frequency bands.
BASS: Play the 5th and 6th open strings while slowly tweaking the BASS knob from minimum to the critical point for bass frequencies. You'll notice a rapid increase in bass volume, signaling the critical point for low frequencies.
MID: Play the 3rd and 4th open strings while adjusting the MID knob from minimum to the critical point for midrange frequencies. Listen for the swift rise in mid frequencies as you approach this point.
TREBLE: Utilize the 1st and 2nd open strings while fine-tuning the TREBLE knob from minimum to its critical point. You'll perceive a quick surge in high-frequency volume as you approach the treble critical point.
PRESENCE: Employ the 1st and 2nd open strings while adjusting the PRESENCE knob from minimum to its critical point. Listen keenly for the rapid increase in presence frequencies, revealing the critical point for enhancing the amp's overall presence.
Factors Influencing Critical Points
Amplifier Characteristics: The design, circuitry, and components within an amp heavily influence its critical points. Different amps might have varying critical frequencies due to different designs or intended purposes (e.g., clean vs. high-gain amps).
Guitar and Pickup Types: The type of guitar and pickups used also contribute to critical points. Single-coil pickups may respond differently compared to humbuckers, influencing how the amplifier's EQ settings affect the overall tone.
Identifying critical frequencies acts as your roadmap for precise tonal refinement. This methodical exploration prevents overemphasis on bass, mid, treble, or presence, enabling deliberate adjustments while preserving tonal balance and clarity. Gradually discovering these critical points through careful knob adjustments and attentive listening enhances your understanding of your amp's EQ spectrum. This knowledge empowers you to sculpt your desired tone with precision and finesse.
Once you've unveiled the critical frequencies within your amp's EQ spectrum, the next pivotal step is pinpointing the ideal gain and volume settings. This process ensures a balanced and nuanced tone while recalling the reference volume for consistency.
Finding the Ideal Gain: Gradually tweak the gain control until you strike the sweet spot. This sweet spot represents the optimum level of distortion or overdrive without sacrificing clarity or overwhelming the tone. It's where your guitar's notes retain articulation and depth while delivering the desired level of crunch or saturation.
Balancing with Volume: Once the gain sweet spot is found, adjust the volume control accordingly. Aim for a balanced volume that complements the gain setting, ensuring that the overall output level remains in harmony with the tonal characteristics you've crafted.
But the amp is only half the story—pair it with the right cabinet impulse response (IR). IRs replicate the sound of different speaker cabinets and mic placements. Experiment with various IRs until you find the one that complements your chosen amp, providing the depth and character you're seeking. While the amp sets the stage for your tone, it's the often-overlooked hero—the cabinet impulse response (IR)—that truly shapes your sonic landscape.
The IR replicates a speaker cabinet's essence, capturing its unique sonic fingerprint. It's the virtual translation of how sound waves interact within a cabinet, and it serves as the primary equalizer for your entire sound. Choosing the right IR is an artistic endeavor. It's about exploring a gallery of sonic paintings, each representing a different cabinet and mic placement.
Each element in your signal chain plays a crucial role in shaping your sound. The choice of cabinet size, in particular, carries distinct sonic implications that directly influence your overall tone. 1x12 cabinets deliver a sharper, thinner sound, ideal for brightness and cutting through the mix. 4x12 cabinets offer a fuller, warmer tone but may sacrifice initial brightness for depth and richness. 2x12 cabinets strike a balance, providing punchiness and some balance across the tonal spectrum, though lacking the depth of a 4x12. The MG-30 has great selection of cabinet speakers that fit the amp models.
Additionally, selecting the right microphone and its placement is the final touch in shaping your tone. The MG-30 offers a very complete and versatile selection of microphones plus 3 essential microphone positions.
Dynamic mics like the S57 offer punch and brightness, while condenser mics like the U87 capture detailed nuances and a more complete EQ range. Ribbon mics like the R112 and R121 are a different beast. It captures a warmer yet detailed sound character. Each adds a distinct texture to your sound.
Mic placement influences tone. Center placement emphasizes brightness; shifting towards the cabinet's edge creates warmth and roundness. The middle mic placement in the MG-30 is probably the most balanced one but it all still depends on what sound you're going for.
What if you've already found that perfect Impulse Response (IR) that encapsulates your ideal tone elsewhere? The beauty of the MG-30 lies in its flexibility—it allows you to import 3rd-party IRs, putting the power to sculpt your tone even more firmly in your hands. The ability to import 3rd-party IRs into the MG-30 extends the horizon of customization. With 24 user IR slots available, it's a chance to expand beyond the built-in options, allowing you to fine-tune your tone with precision and authenticity.
The EQ section on the NUX MG-30 is your palette, offering the colors to paint your sonic landscape. It's not just about adjusting frequencies—it's about understanding how each tweak shapes your tone. Don't fret if it seems complex—chances are, if you've tweaked the treble, middle, and bass knobs on your amp, you're already familiar with the basics of EQ intuitively.
(PARA EQ)
(6-BAND EQ)
Boost and cut are the two most important words in the EQ game because it's just this simple – you can either boost or cut the frequencies. But the question is, which frequencies should you boost or cut?
Here's a simple guide:
Below 80Hz: If you play with other instruments, you can cut everything below 80Hz so it won't clash with the bass.
100Hz: Low-end rumble, adds depth but can muddy things up.
250Hz: Adds warmth to your guitar tone.
200Hz-350Hz: Watch out for muddy sounds in distortion.
500Hz: Defines your guitar's body and character.
1kHz-3kHz: Adjust for pick sound or reduce harshness.
3kHz-4kHz: Makes your guitar stand out in the mix.
10kHz: Adds brightness and airiness to clean tones.
If you're still lost, don't worry! Here are some great EQ settings you can start with:
Smooth Lead Tone & Mid Boost
Thick and fat tone (great for cleans)
Scooped Metal tone
Thick and warm blues tone
These suggestions serve as guidelines tailored to specific scenarios, yet the ultimate decision rests with you. You hold the reins to mold and craft the EQ according to your desired sonic landscape. These recommendations are like signposts along the way, but the journey of sculpting your sound is uniquely yours to navigate. Feel free to experiment, tweak, and fine-tune until you've carved out the tone that resonates perfectly with your musical vision.
Lastly, positioning the EQ after the IR and Amp in the signal chain is key. It shapes the entire sonic spectrum, including the unique characteristics of the amp and cabinet models. This placement gives the EQ control over the final sound, allowing precise adjustments to tailor your tone to perfection.
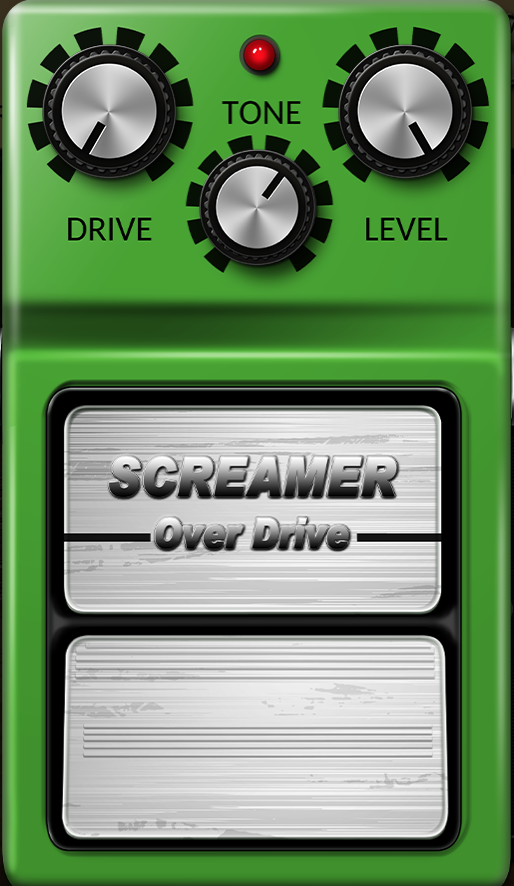
Drive, Distortions, and Boost pedals can elevate your tone. Experiment to find the drive that resonates with your sound. These elements can add texture and depth to your playing. Drive pedals, ranging from clean to mild overdrive to searing distortion, are the artists behind color and saturation. They enhance your guitar's signal before it reaches the amplifier, introducing varying degrees of clipping to mimic the warmth and growl of overdriven tube amps. Each pedal also has a unique kind of compression that enhances the dynamics of your sound.
In terms of where to place it, placing the drive pedal before or in front of the amp in your signal chain allows it to manipulate the input signal of your guitar directly, sculpting the tone before it encounters the amp's natural characteristics. This positioning extracts the pedal's full potential, enabling it to interact naturally with the amp's own drive characteristics.
Every drive has its own sound and unique characteristic...
For example, the T SCREAM gives you a midrange hump and smooth, creamy overdrive. Its character lies in its ability to add warmth and a touch of grit without overpowering the original tone. Great for blues and rock tones. It also serves as a great boost to high gain amps.
The EAT DIST on the other hand, has an aggressive, gritty distortion with a pronounced, articulate character. Its unique tone ranges from a crunchy overdrive to a searing, fuzz-laden distortion. Great for rock, grunge, and metal.
The MG-30 also has very transparent clean boosts like the RC BOOST and KATANA. Their magic lies in its ability to enhance the guitar's natural tone, adding clarity and depth without coloring the original sound. They both add pristine clarity, making them go-to choices for players aiming to elevate their existing tone.
Katana
RC Boost
These examples just barely scratches the surface of the MG-30's extensive roster of meticulously selected drives, distortions, and boosts. The MG-30 has a total of 14 essential drive, distortion, boost, and fuzz pedals you can select from!
When it comes to creating atmosphere and depth in your guitar tones, delay and reverb reign supreme.
Reverb is your sonic environment. It emulates the acoustic characteristics of different spaces, from the tight slap of a small room to the expansive wash of a cathedral and even the big and boomy sound of an arena. Basically, this gives your tone a sense of space. The MG-30 gives you a lot of reverb options that fit any situation. For a dry yet spacious sound, go with the ROOM reverb. If you want a super spacious and ambient sound, go for the HALL reverb. If you want to go crazy with ambience and dimension and a super unique sound, go with the SHIMMER reverb. Looking for a timeless classic ambience, go with the SPRING reverb. These are just a few examples of the MG-30's reverb options. You can explore more on what works for you in your musical situation and what you want for your tone.
Hall Reverb
Room Reverb
Spring Reverb
Shimmer Reverb
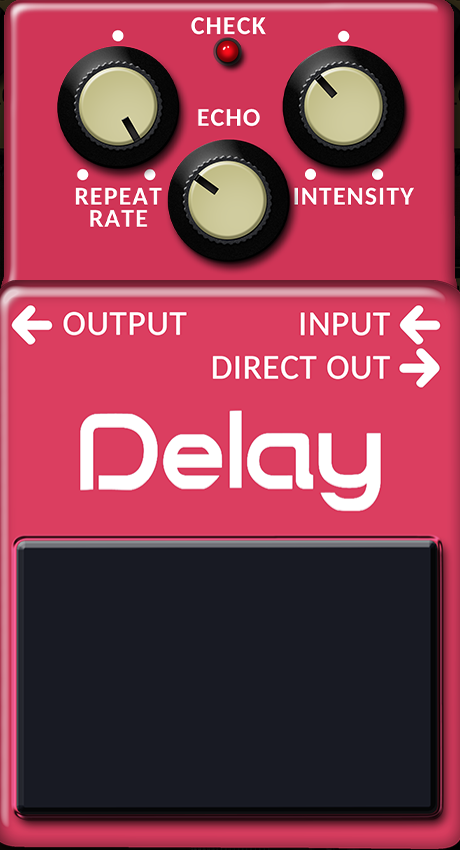
Delay, on the other hand, takes what you play and repeats it, creating echoes that can be subtle or build into layers. By adjusting settings like delay time (how long the echo takes to repeat), feedback (how many echoes you hear), and modulation (adding movement to the echoes), you can make your playing sound more intricate and dynamic. If you want a straightforward delay sound, go with the DIGITAL DELAY. If you're going for warm sounding delay, go for the ANALOG DELAY. If you want a diverse and expansive delay with tons of different variations, go with the DUOTIME DELAY. And if you're an avid Eric Johnson fan, you might want to go with the TAPE ECHO as it gives you warm and saturated repeats that pairs well with an overdriven sound. These are just a few examples because the MG-30 has a lot more to offer when it come to these time-based effects.
Duo Time Delay
Analog Delay
Digital Delay
Tape Echo
Now, for the perennial question: which comes first, delay or reverb? The answer lies in the sonic landscape you want to create. Placing delay before reverb allows the echoed repeats to be further shaped by the reverb, creating a sense of depth while maintaining clarity. This arrangement suits ambient and spacious tones, ensuring the repeats don't get lost in the reverberation. Conversely, putting reverb before delay can blend the echoes into the ambient space. This approach can create a more cohesive, blended sound, particularly suited for ethereal or dream-like tones. It really does depend on what you want to achieve with your tone.
In addition, you can also place them in PARALLEL. Yes! Putting them in parallel will send 2 unaffected signals to each effect. Using parallel processing will eliminate any overshadowing of sound, letting both the delay and reverb shine on their own.
Remember, the beauty of delay and reverb lies in their versatility. Don't shy away from experimenting with various settings, stacking different types of delays or reverbs, altering their placement in the signal chain, and modulating their parameters.
While amps, EQ, drive, delay, and reverb lay the foundation, modulation pedals add an extra layer of "magic" and "uniqueness" to your tone. Within the NUX MG-30's arsenal, these effects can redefine your sound, offering a spectrum of sonic textures. Just like when Eddie Van Halen added Flangers and Phasers to his sound and when Paul Gilbert added Chorus to his lead tone. These effects can make your tone stand out in the crowd just like how EVH and Paul Gilbert did.
The placement of modulation effects within your signal chain significantly impacts their impact and clarity in your overall tone. While there's no strict rule, a common placement is after drive pedals but before time-based effects like delay and reverb.
Before Delay and Reverb: Placing modulation effects before delay and reverb maintains clarity, allowing the modulations to maintain their distinct character without being washed out by the spatial effects.
After the Amp and Drive Pedals: Putting modulation effects after the amp and drive pedals allows the modulation to act upon the distorted signal, creating unique and expressive tones without altering the core drive characteristics.
Incorporating modulation pedals into your preset can be transformative. Experiment with different modulation types to find the one that complements your playing style and musical genre. With the MG-30 you have 14 different types of modulations from Chorus, Flangers, and Phasers.
NOW, LET'S RECAP!
Find the Amp Model and IR that suits your style
Shape it further with EQ
Add Drives, Distortions, or Boosts to give it a kick
Add Delay and Reverb for a sense of space
Add Modulations and other EFX for some magic
From foundational amp setups to nuanced EQ sculpting, exploring drive, FX, and spatial effects, and delving into modulation nuances, this guide empowers you to master your sound. It's about finding your sonic identity within a world of possibilities.
Mastering your tones is only part of the equation; optimizing your setup for live (and studio) performances ensures your crafted sounds shine in any scenario. Understanding unity gain, output modes, scenes, and utilizing footswitches maximizes the NUX MG-30's potential in any performance situation.
Unity Gain: Unveiling Clarity
Unity gain refers to matching the input and output levels, preserving your tone's integrity. Setting this correctly is crucial—it prevents signal degradation and ensures consistency in sound across different settings or effects. It maintains a consistent volume level when switching between presets, preventing abrupt jumps or drops in volume that could disrupt your performance. Proper unity gain preserves the dynamics and nuances of your crafted tones, allowing them to shine through without distortion or loss of quality.
Think of it like setting all the volume knobs to the same loudness level. Professionals often set everything to 0 decibels (0dB) on the meters or indicators. This ensures that when you play your instrument, the signal sent and received stays consistent. Even if some gear can make things louder, start by setting everything to work together at the same level for the best sound quality. Then, if needed, you can use that extra boost without messing up the balance.
In gain staging, you begin by establishing a starting point—a reference level. This often involves aiming for a level around 0 decibels (0dB) on meters or indicators, like setting all your volume knobs to a certain point.
Output Modes: Tailoring to Your Setup
Studio Direct: Ideal for connecting to mixers, audio interfaces, or PA systems, offering a direct feed for studio recording or live sound.
Combo Rear and Stack Rear: Utilized by those integrating the NUX MG-30 into amp setups through the FX loop (return) for a seamless blend of digital and analog tones.
Combo Front and Stack Front: Direct connections to the front of combo amps or amp heads, offering flexibility in integrating the NUX MG-30 with various amplifier configurations.
Check this video out for a quick look into the output modes:
Utilizing Scenes: Snapshot Your Sound
What are Scenes? Scenes are snapshots of different settings, allowing easy and quick switching between presets during live performances.
Why are They Useful? Scenes enable swift transitions between songs or sections, providing a streamlined performance experience.
For a more in-depth showcase for the scenes function, check out The Pedal Guy's video about using scenes on the MG-30.
Utilizing Ctrl Switch and NMP-2 Footswitch: Empowering On-Stage Control
In the realm of live performances, having control at your feet is paramount. The NUX MG-30 integrates seamlessly with the CTRL Switch and INCLUDED NUX NMP-2 external footswitch, unlocking a world of hands-free possibilities.
Within the NUX MG-30's interface, assign effects to individual footswitches. For example, assign a distortion pedal to one footswitch and a delay to another for swift toggling between different effects. During performances, the ability to toggle effects on and off without interrupting your playing adds fluidity to your set, enhancing dynamics and transitions between songs or sections.
You could also assign a TAP TEMPO function on the switches. Tap tempo enables you to set the tempo of time-based effects like delay or tremolo by tapping a footswitch in rhythm with the music, synchronizing the effect to the performance tempo. Adjusting the tempo on the fly ensures that time-based effects remain in sync with the band, accommodating changes in tempo during live performances seamlessly.
Here's a video on how you can setup the NUX NMP-2 with the MG-30
Incorporating footswitches into your NUX MG-30 setup grants you instant access to a spectrum of sounds and functionalities, transforming your live performances into dynamic, expressive experiences.
You Are Not Alone!
Yes, you are not alone in your journey to achieve great tones. You can check out the NUX-MG30 Patch / IR Sharing and Discussion Facebook Group. See the MG-30 in action, engage in discussions about its features, and dive into shared presets. Get inspired by fellow musicians' tones and join the conversation on crafting exceptional sounds with the NUX MG-30.
You're Good To Go!
The journey to sonic excellence is a blend of artistry, innovation, and community, and the NUX MG-30 Multi-FX and Amp Modeler serve as the conduit for this musical odyssey. From the analog-inspired familiarity of its setup to the endless possibilities of digital innovation, the NUX MG-30 empowers you to sculpt your personalized tones. Dive into amp simulations, fine-tune EQ intricacies, explore effects, and delve into modulation nuances—it's about finding your sonic identity. Stepping onto the stage requires precision, and the NUX MG-30 caters to this need seamlessly. Understanding unity gain, diverse output modes, the dynamic versatility of scenes, and the command center capability of footswitches ensure that live performances are dynamic, expressive, and effortless.
In your musical journey, the NUX MG-30 transcends being a mere tool—it's an extension of your artistry. Embrace its features, explore endless possibilities, and let your creativity redefine your sonic world.


No comments:
Post a Comment